MariaDB: Improve Security with Two-Step Verification
In this primer I will show how to improve the security of your MariaDB installation by using two-step verification and how to use it from your Windows GUI client.
Let’s suppose you have your data in MariaDB, installed, say, on Ubuntu. And your users connect to it to run ad hoc queries, using some sort of a Windows GUI client. You don’t want them to write the access password on post-it notes or have it auto-entered by the client. And you don’t want anyone see the password when one of the salespersons connects to the mother ship from his laptop in the Internet café. So you decide to use the two-step verification, just like Google does, to secure the access to the data.
If you don’t know what a “two-step verification” is, see, for example, this introductory video by Google.
So, 2-step verification looks great, but how can we implement it? Luckily, there is a PAM module in the Google Authenticator project, and we can use it with a MariaDB PAM authentication plugin.
Let me digress for a second. Below we will implement a 2-step verification based on Google Authenticator. But you may want to evaluate other similar solutions before putting this primer in production. There are quite a few PAM modules implementing one-time password approach (and pam_google_authenticator is just one of them). In particular, OPIE (and S/Key) look interesting, because they don’t require a valid Unix account and a home directory for every user. There are also hardware based solutions, where a user is required to have a small password generating device (like, for example, RSA SecurID).
But back to Google Authenticator. First, we need to install the PAM module. On Ubuntu 11.10 it is very simple: one apt-get. On distributions that don’t include it (and older Ubuntu versions), you can use manual installation instructions.
Either way, we install /lib/security/pam_google_authenticator.so (I don’t have Ubuntu 11.10, so I had to do it manually). For a 2-step verification we need to require both the normal account password and the one-time code. This can be achieved with the following PAM configuration file:
auth            required        pam_unix.so
auth            required        pam_google_authenticator.so
account         required        pam_unix.so
I had to put it in /etc/pam.d/mysql file, on your system the location may be different. Having done that, let’s install the MariaDB PAM plugin and create the user account:
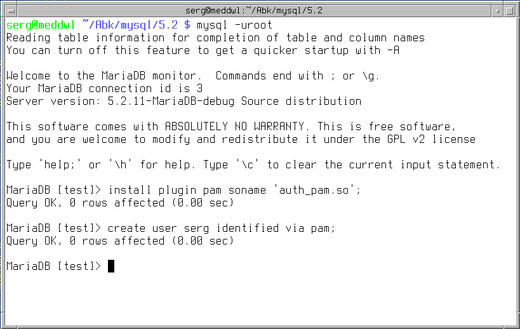
Now we need to configure Google Authenticator for an account:
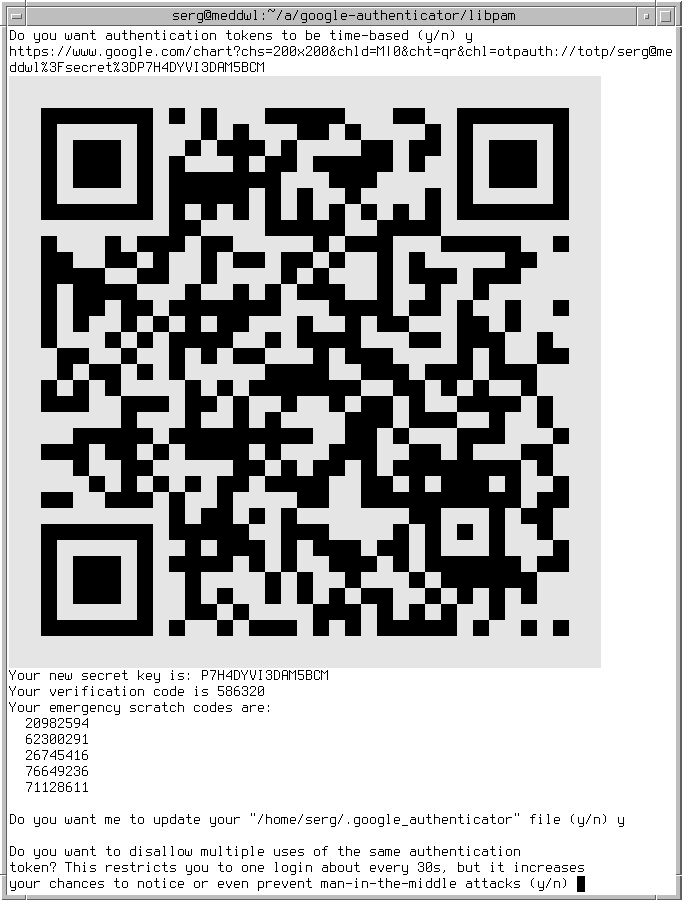
Time to install a password generator application. There are versions for Android, iOS, and Blackberry. Google explains the details. When the installation is finished, start the application and enter the secret key into it — manually or using the QR-code. And we’re done and can use two-step verification when connecting to MariaDB. But our users use Windows! How will it play along?
The answer depends on the Windows MariaDB client that that your users have. At the moment of writing this article, only HeidiSQL has full support for pluggable authentication. You may already have it installed — HeidiSQL is part of MariaDB Windows distribution. Alternatively, you can download it directly from the official site.
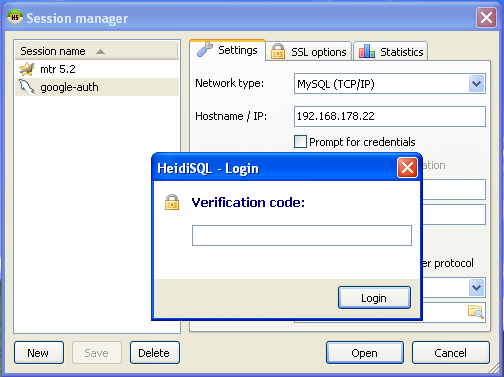
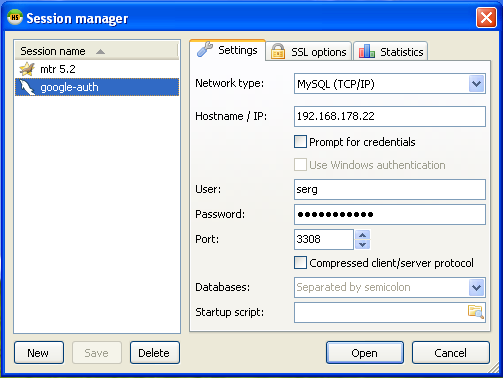
First, we use HeidiSQL session manager to configure the connection parameters. Here, we will connect as the user “serg” — the user, that we have created above to use the PAM authentication plugin. Note that there is no special configuration for pluggable authentication on the client, it is enabled automatically when necessary.
Now we can connect to the server. It uses PAM authentication plugin, that loads Google Authenticator, that asks for a verification code. And we see HeidiSQL asking:
We start the Authenticator application, it generates the verification code:
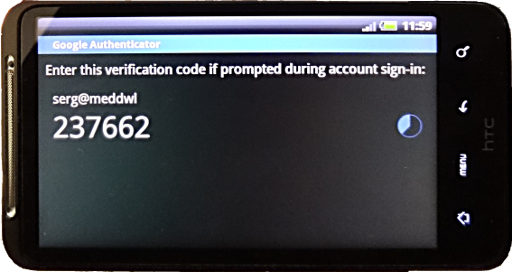
And we use it to login! Next time the verification code will be different, and nobody looking over the shoulder will be able to steal our precious connection password.
how could i use it with php or other mysql client?
hi sergei, i got some errors and couldn’t loggin
i got this from /var/log/auth.log
unix_chkpwd[30882]: check pass; user unknown
unix_chkpwd[30882]: password check failed for user (rspadim)
mysqld[2290]: pam_unix(mysql:auth): authentication failure; logname= uid=89 euid=89 tty= ruser= rhost= user=rspadim
mysql(pam_google_authenticator)[2290]: Failed to change user id to “rspadim”
i’m running last mariadb 10.0.0
any idea?